电脑w10开机fixing (e)stage如何取消 电脑w10开机fixing (e)stage取消方法
更新时间:2024-06-09 16:02:39作者:yang
在使用Windows 10系统的过程中,有时会遇到开机过程中出现"fixing (e)stage"的情况,这可能是由于系统在启动时正在进行磁盘扫描和修复操作,如果我们想要取消这一过程,可以尝试在开机过程中按下Ctrl + C组合键来终止修复操作。需要注意的是,取消修复操作可能会导致系统出现问题,建议在确保数据安全的情况下谨慎操作。
具体方法:
1、首先进入驱动器属性,点击工具界面,可以看到检查驱动器中的文件错误


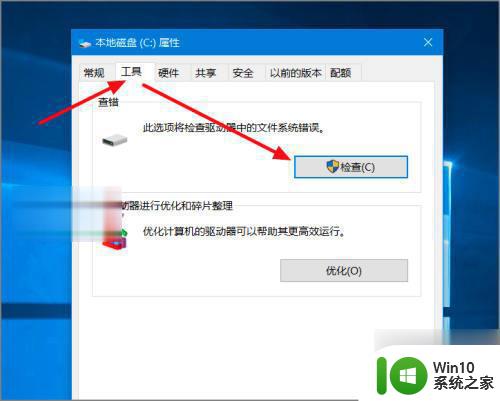

2、然后点击扫描驱动器,扫描完之后看看是否有问题


3、而对于一些硬盘有坏道或少量其他问题可以使用不影响硬盘开机使用,则可以将的Windows10开机检查磁盘的功能禁用掉

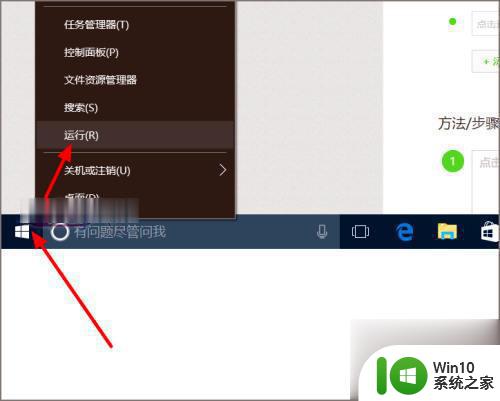
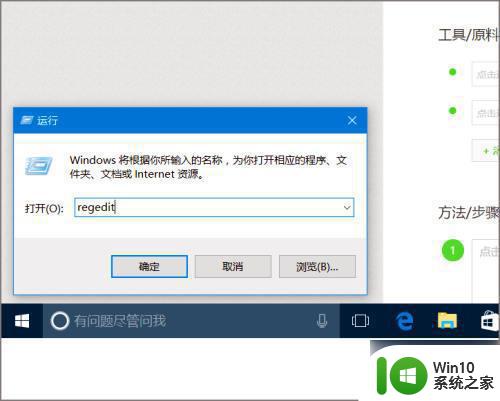
4、右键开始菜单中的运行,输入regedit,进入Win10注册表管理器

5、下面路径HKEY_LOCAL_MACHINESYSTEMCurrentControlSetControl,找到Session Manager
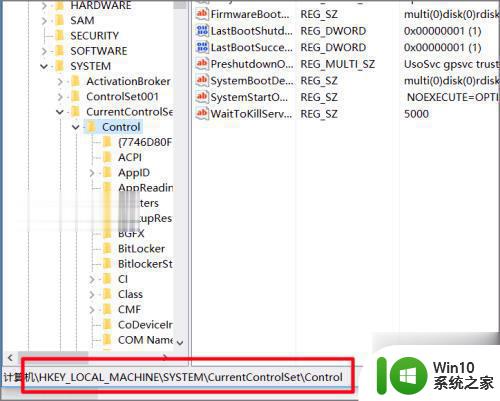

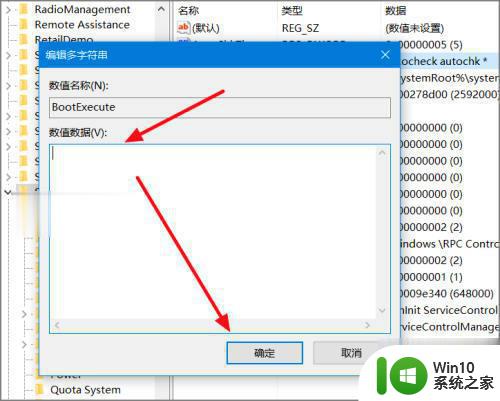
6、在Session Manager文件夹中找到BootExecute并双击打开

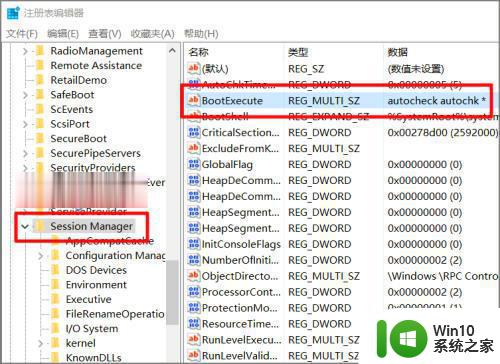
7、将BootExecute数据autocheck autochk *删除,确定重启即可

以上就是电脑w10开机fixing (e)stage如何取消的全部内容,有遇到这种情况的用户可以按照小编的方法来进行解决,希望能够帮助到大家。
电脑w10开机fixing (e)stage如何取消 电脑w10开机fixing (e)stage取消方法相关教程
- w10如何取消电脑开机登录密码 w10电脑开机密码怎么取消
- w10电脑如何取消wifi自动连接 w10电脑wifi怎么取消自动连接
- w10关闭开机密码设置方法 w10开机密码如何取消
- w10电脑开机广告自动弹出解决方法 W10电脑开机广告自动弹出怎么取消
- win10电脑开机pin码怎么取消 win10电脑取消开机PIN码的步骤
- wwin10取消开机密码 win10电脑如何取消开机密码
- win10取消开机密码的方法 win10电脑上如何取消密码设置
- w10关闭开机密码的方法 Windows 10如何取消开机密码保护
- w10开机广告怎么取消 怎么去掉w10开机广告
- win10如何取消电脑自动关机 win10如何取消电脑自动关机命令
- win10电脑PIN密码怎么取消 如何在win10中取消开机PIN密码
- win10更新后开机密码如何取消 w10更新完怎么关闭开机密码
- win10玩只狼:影逝二度游戏卡顿什么原因 win10玩只狼:影逝二度游戏卡顿的处理方法 win10只狼影逝二度游戏卡顿解决方法
- 《极品飞车13:变速》win10无法启动解决方法 极品飞车13变速win10闪退解决方法
- win10桌面图标设置没有权限访问如何处理 Win10桌面图标权限访问被拒绝怎么办
- win10打不开应用商店一直转圈修复方法 win10应用商店打不开怎么办
win10系统教程推荐
- 1 win10桌面图标设置没有权限访问如何处理 Win10桌面图标权限访问被拒绝怎么办
- 2 win10关闭个人信息收集的最佳方法 如何在win10中关闭个人信息收集
- 3 英雄联盟win10无法初始化图像设备怎么办 英雄联盟win10启动黑屏怎么解决
- 4 win10需要来自system权限才能删除解决方法 Win10删除文件需要管理员权限解决方法
- 5 win10电脑查看激活密码的快捷方法 win10电脑激活密码查看方法
- 6 win10平板模式怎么切换电脑模式快捷键 win10平板模式如何切换至电脑模式
- 7 win10 usb无法识别鼠标无法操作如何修复 Win10 USB接口无法识别鼠标怎么办
- 8 笔记本电脑win10更新后开机黑屏很久才有画面如何修复 win10更新后笔记本电脑开机黑屏怎么办
- 9 电脑w10设备管理器里没有蓝牙怎么办 电脑w10蓝牙设备管理器找不到
- 10 win10系统此电脑中的文件夹怎么删除 win10系统如何删除文件夹
win10系统推荐
- 1 番茄家园ghost win10 64位旗舰简化版v2023.04
- 2 戴尔笔记本ghost win10 sp1 64位正式安装版v2023.04
- 3 中关村ghost win10 64位标准旗舰版下载v2023.04
- 4 索尼笔记本ghost win10 32位优化安装版v2023.04
- 5 系统之家ghost win10 32位中文旗舰版下载v2023.04
- 6 雨林木风ghost win10 64位简化游戏版v2023.04
- 7 电脑公司ghost win10 64位安全免激活版v2023.04
- 8 系统之家ghost win10 32位经典装机版下载v2023.04
- 9 宏碁笔记本ghost win10 64位官方免激活版v2023.04
- 10 雨林木风ghost win10 64位镜像快速版v2023.04